Rob’s Syracusan faction leads the way as we hit the halfway point of the campaign. Both of his armies are at full strength, he has twelve prestige points and four garrisoned cities. There is also an undiscovered Syracusan spy lurking around one of the other faction camps.
Interestingly, we are all sitting at two wins and two losses on the fighting front. If you have just joined the proceedings, links to earlier turns can be found at the bottom of the page.
Turn six map
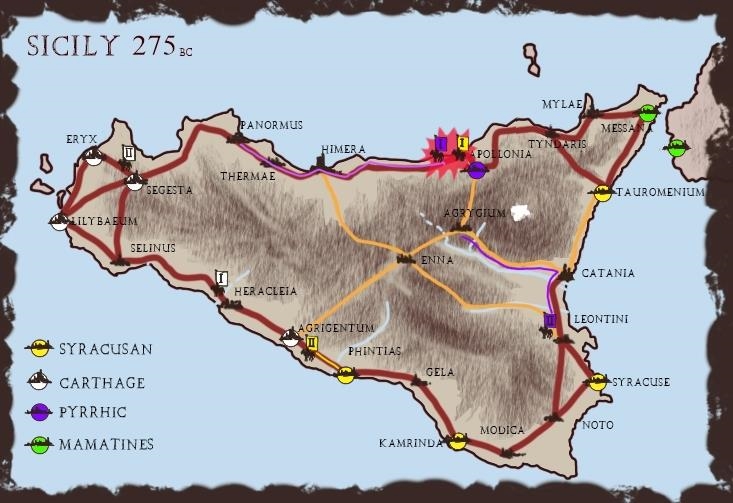
Initiative and Movement
- Rob’s 1st army marches on Apollonia looking to take my last city.
- After an exhausting forced march, my 1st army confronts the Syracusans at Apollonia
- Michael’s 1st army looks for fresh recruits in Heracleia
- Michael’s 2nd army follows suit in Segesta
- Rob’s 2nd army moves up the coast to lay siege to Agrigentum
- My 2nd Army force marches to Leontini cutting the supply lines to Rob’s 1st army
Michael has a pretty quiet turn this round. He decides to sit tight and rebuild his armies after his last two defeats. Regrettably, with his prestige at an all-time low, the Carthaginian commander cannot find anyone willing to join his ranks.
Rob moves his second army to Agrigentum. Planning to storm the city and thereby reopening a supply line to his first army. He adds one prestige point to his siege dice roll but fails to take the city.
My poor armies force-march all over Sicily this turn. Despite the poor roads my second army made good time and arrived in Leontini still fresh. After the battle at Panormus and the subsequent march down the coastline, my first army is understandably in a state of exhaustion. No time to rest though, because if I lose at Apollonia the campaign would be over for me.
We all gain a single prestige point in the initiative rolls this turn.

It would seem that Rob is the only one any good at math here. Michael and I continually field armies that are short on points. Here at Apollonia, I’ve short-changed myself three points before we even rolled a dice. Maybe they went to check on the garrison or something?
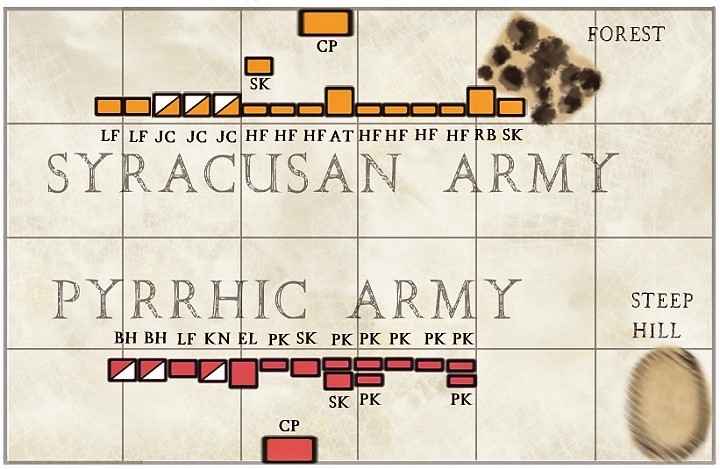
Deployment map and unit key
Syracusans 50 points
Pyrrhic 47 points but should have been 50 points
- SK: Skirmishers (3 pts)
- RB: Rabble (2 pts)
- LF: Lightfoot (3 pts)
- HF: Heavyfoot (3 pts)
- AT: Artillery (3 pts)
- PK: Pike-men (3 pts)
- EL: Elephants (4 pts)
- KN: Knights (4 pts)
- BH: Bad horse (3 pts)
- JC: Javelin cavalry (4 pts)
- CM: Camp Free
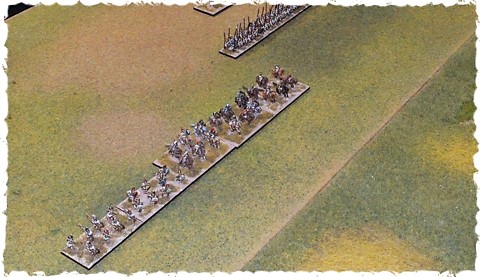
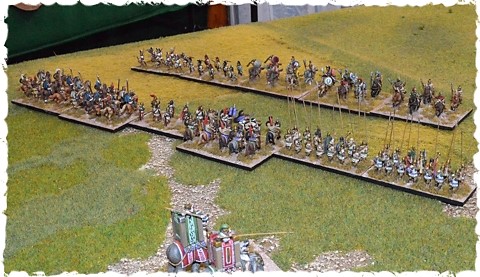

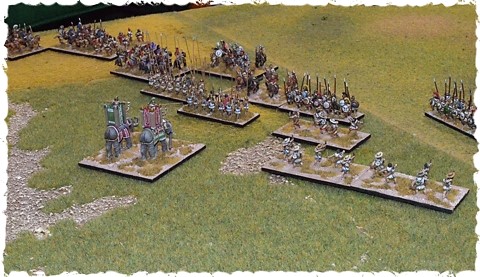
It’s about now in the battle that I start getting nervous. I have an overlap on the left but when you fight with low factor match ups something will generally die. If I launch the attack in my turn and the dice are bad. You can bet Rob will exploit any holes in my line on his following turn. Knowing this Rob ramps up the pressure by moving his hoplites into support range.
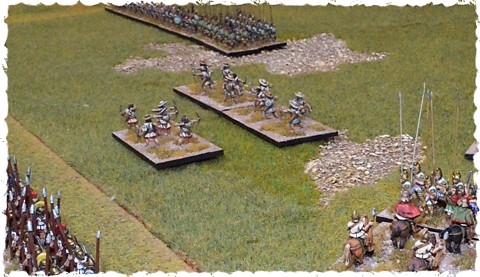
I rush my skirmishers forward to form a stopgap between my left and right flanks. This works but locks my elephants out of the battle. It’s all down to who goes in first on the left and how the dice fall. Rob has support on the way and I don’t so my window of opportunity is closing fast. Time to roll some dice before I get rolled over.

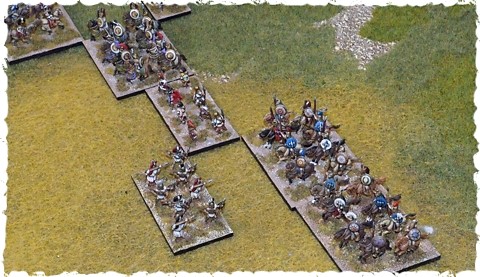
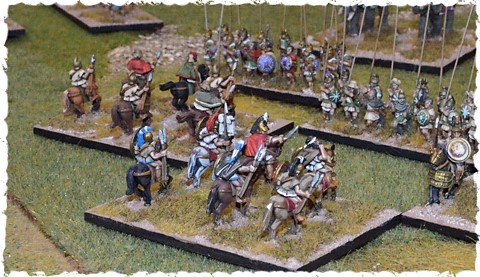
Despite my overlap, Rob’s light foot push back my bad horse. His Javelin cavalry at the opposite end of the line also give a good account of themselves. It’s only in the middle that I have cause to celebrate as my knight general breaks through his line.
A pip drought now hits the Syracusan army just when they don’t need it. A single element of hoplites joins the fray, but its options are limited by the hairy swarm of skirmishers demonstrating before it.
I surround and dispatch some more light foot in the next round. To which Rob returns the compliment by removing a unit of my pike-men from the field. The skirmishers finally come to blows just as my general cuts up another unit of javelin cavalry ending the battle.
Results to transfer to the campaign
Casualties for Pyrrhic first army
- 1x Pike-men (3 points)
- Total (3 points)
I net twelve prestige points at Rob’s expense for the win. However, my army is exhausted from its long march before the battle. Therefore I lose one army strength point for every three battle casualties. This drops my army down to 49 points and it remains exhausted in Apollonia.
Battle casualties for the first army of Syracuse
- 2x Light foot (6 points)
- 2x Javelin cavalry (8 points)
- 1x Skirmisher (3 points)
- Total of 17 points
Rob’s army strength drops down to forty-six points. He chooses to retreat along the secondary road to Agrygium rather than head back the way he came.
Updated map at the bottom of turn six.
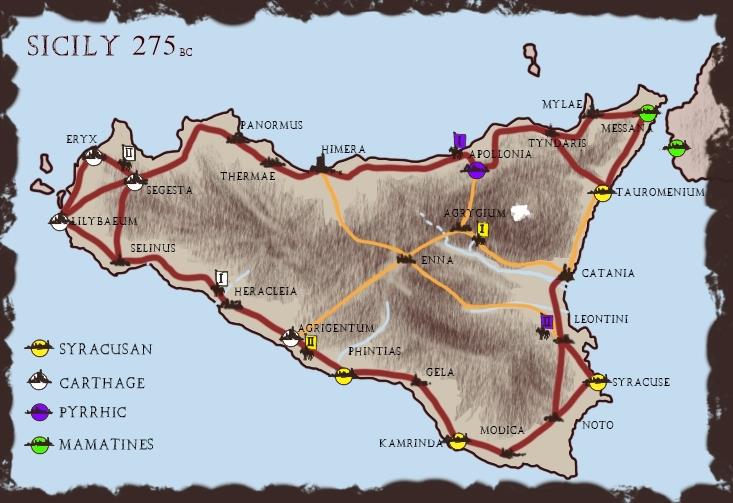
Wow, that was a turn of events. A lucky escape for me one might say. The big question going into turn seven is what to do with my army at Leontini? I could press on and siege Syracuse, but with Rob’s army at Agrygium the hunter may become the hunted. I could sit tight and garrison Leontini. That would cause all manner of supply problems for the Syracusans. If attacked and beaten I would still be able to fall back via Enna.
Campaign turn seven
Initiative and movement
- 2nd Syracusan army moves from Agrigentum to Enna
- I reinforce the garrison at Apollonia (now 6 points)
- The Carthaginians move to Agrigentum cutting Rob’s supply lines
- Michael’s second army welcomes new recruits in Segesta (4 points)
- My army at Leontini force marches back to Tauromeum. The roads are bad and as such my army is exhausted by the ordeal.
- Rob’s first army arrives in Catania too late to catch my Pyrrhic troops.

Rob’s army at Agrigentum wins the initiative roll. He ceases siege operations and after paying a small bribe (one prestige point) to the Carthaginians takes the road to Enna. You normally can’t bypass a garrisoned city, but diplomatic maneuvers can allow this to happen.
Michael moves his first army back into Agrigentum closing the door on Rob. Meanwhile, the good citizens of Segesta are encouraged more vigorously to supply men for the Carthaginian war machine.
With the Syracusan net closing around my troops in Leontini I decide to make a run for Tauromenium. The last of my army passes through Cantania mere hours before Rob’s light cavalry arrive. The effort has left my army exhausted as it regroups outside the walls of a hostile city.